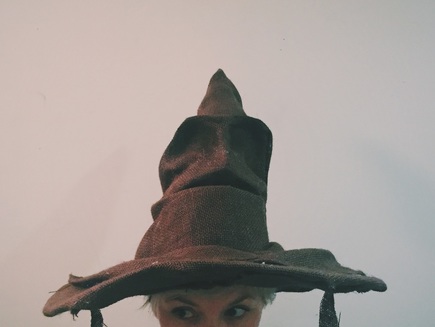
I'm a Hufflepuff through and through. I once took a quiz that was supposed to tell you which other house the Sorting Hat was considering for you and I still got Hufflepuff. No matter which house you're in you should have a Sorting Hat of your own! Below are instructions! Happy sorting!
What You'll Need:
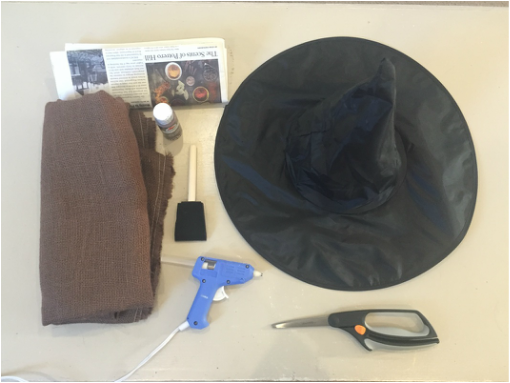
Witch's hat
Brown fabric (1 -1 1/2 yards)
Newspaper
Glue
Scissors
Poster board or other stiff paper (not pictured)
Brown paint & paintbrush (optional)
Brown fabric (1 -1 1/2 yards)
Newspaper
Glue
Scissors
Poster board or other stiff paper (not pictured)
Brown paint & paintbrush (optional)
How To:
I chose to use brown burlap for the fabric to make my sorting hat so my first step was to paint the hat brown since you can see through it. If you choose a more solid fabric or like the look of the brown over the black then you can skip the painting and jump ahead. If not, just paint all over your hat - it doesn't need to be perfect. Then wait for it to dry before moving on.
When you're happy with the color of your witch's hat it's time to move on to the real crafting!
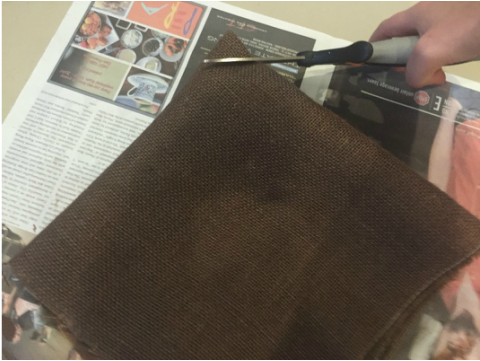
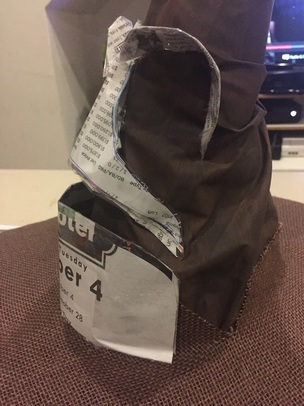
Now, lay your fabric down then set your hat down on top and cut around the brim of the hat (I'd cut the fabric at least 2 inches larger than the brim).
Now, lay your fabric down then set your hat down on top and cut around the brim of the hat (I'd cut the fabric at least 2 inches larger than the brim).
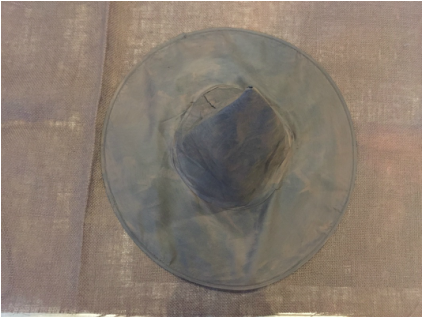 |  |
Now, fold the fabric you've just cut out into 4 roughly equal parts then cut the corner where all of the folds are connected so when opened it creates a hole in the center of the fabric.
Now open up your fabric and slide over the cone part of the hat. Chances are the hole you cut won't be big enough so make four small cuts, one on each side, and slide the fabric down until it reaches the base of the hat.

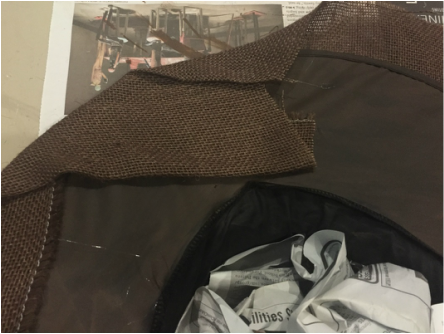
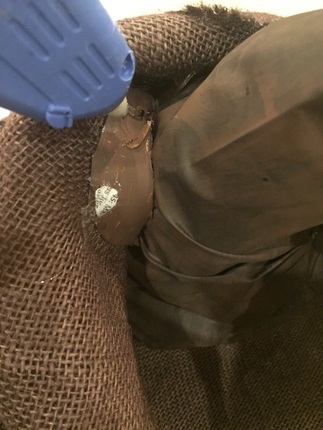
Next, stuff the hat with newspaper so it stands up on it's own - cut a little more of each side to make the fabric to fit as needed. Once your fabric fits around the base of the hat it's time to glue it on! Fold the fabric over the edge and glue around the underside of the brim (I was using hot glue so I glued and attached in sections to avoid the glue cooling down to much before I could get to it).
 Something like this. | 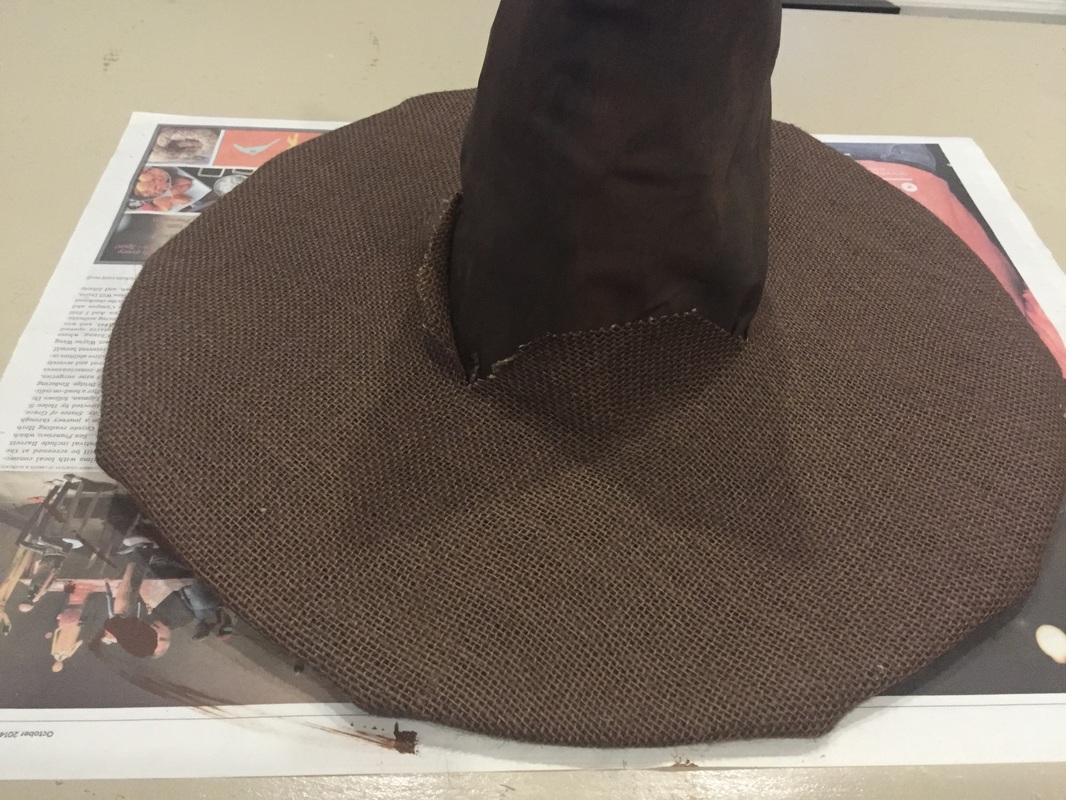 Then this. |
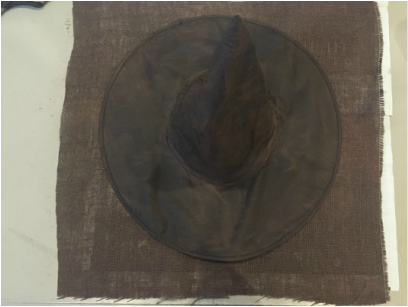
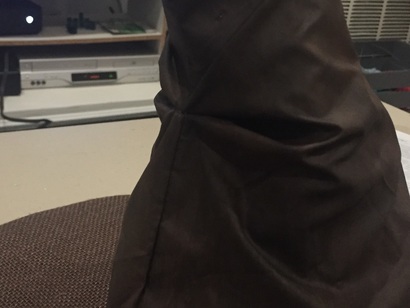
Next up is the bend in the hat - I chose to bend the hat back a little but you can do it however you think looks best. All you need to do is bend the hat and glue the fabric together and hold it until it sets.
Okay, I'll be honest, this next part was pretty difficult for me but hopefully you'll have less frustration. This part is the face. I was initially going to do this whole project in paper mâché so when I changed my mind I wasn't fully prepared and didn't have any poster board to make the face, so I used several sheets of newspaper taped together - I wouldn't recommend this but it's okay in a pinch.
You'll first want to trace out your shapes. Eyebrows, nose & top of the mouth, and bottom of the mouth. I cut out crescent shapes for the eyebrows then sort of a bubbly like capital "T" for the nose & mouth. The chin/bottom of the mouth was basically just a capital "D."
You'll first want to trace out your shapes. Eyebrows, nose & top of the mouth, and bottom of the mouth. I cut out crescent shapes for the eyebrows then sort of a bubbly like capital "T" for the nose & mouth. The chin/bottom of the mouth was basically just a capital "D."
 | 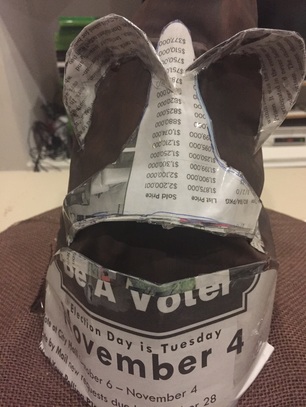 |
Bend the middle of your nose and mouth to give it a bit more shape, then glue the edges down (I only glued the 3 ends of the T shape.. I also stuffed some newspaper into the nose cavity to keep its shape. Note: you can really shape the eyes however you want - the movie Sorting Hat has a little bit of an angry face but I made mine a little cheerier. I feel like he loves his job and is happy to be out, you know?
Because I used newspaper and the burlap I painted the newspaper brown before moving on to the next step.
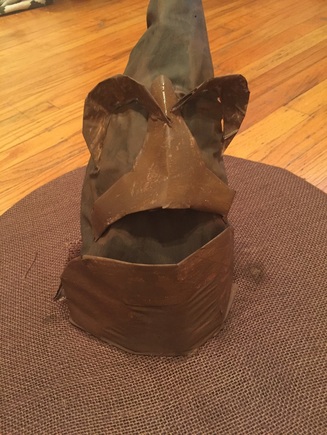
The final step is pretty fun because you get to see everything come together. First you'll want to cut out some fabric - roughly the same size as what you used for the base - Just make sure there's more than enough to wrap around the top of the hat.
When I laid out the fabric I left a little overlap on the base but it just depends on what you like. Play with it a little before you start gluing! Once you do start gluing It's easier if you do it section by section. First the outside of the bottom part of the mouth, then glue and tuck it into the mouth, followed by the top of the mouth, then the nose. Next you'll want to do the eyes, under part of the lids, then finally the top. Take your time to make sure you get the look you want.
When I laid out the fabric I left a little overlap on the base but it just depends on what you like. Play with it a little before you start gluing! Once you do start gluing It's easier if you do it section by section. First the outside of the bottom part of the mouth, then glue and tuck it into the mouth, followed by the top of the mouth, then the nose. Next you'll want to do the eyes, under part of the lids, then finally the top. Take your time to make sure you get the look you want.
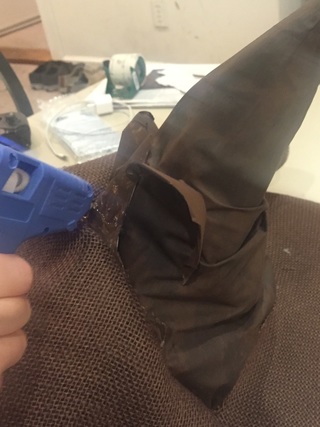 |  |
Once you have the face glued the way you like it all you need to do is secure the fabric to the rest of the hat. I just finished wrapping the fabric around, creating a few creases and glued as I went. Cut off the excess fabric, cover the bottom of the brim and you're done!
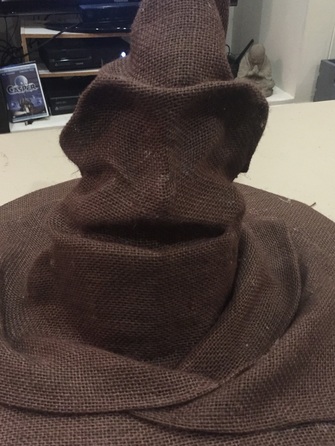
You can also paint the eye sockets and mouth a darker brown or black for depth (I decided I liked mine as is). I also add two strips of the burlap to the underside of the brim like they have in the movie but I feel like that's completely optional (you can see them in the first picture of this post).
 RSS Feed
